Google has launched Google Sync for iPhone/iTouch– which lets you to sync Gmail, Gmail Contacts, and Google Calendars.
Now you don’t need to buy third party applications to get Push Notifications for Gmail on your iPhone / iPod touch, all your Gmail pushed directly to your iPhone. Your inbox is always up to date no matter where you are, or what you’re doing.
All your Google contacts quickly and easily synced to your iPhone. With Sync, you can have access to your address book at anytime and place that you need it. With your iPhone’s/iTouch native calendar, you can now access multiple Google calendars, and be alerted for upcoming appointments with sound or vibration.
To set up Google Sync on your iPhone or iPod touch device, please follow the steps below (via -google):
Requirements and Upload
1. Google Sync is only supported on iPhone OS versions 3.0 and above. You can check your current version by going to Settings > General > About > Version. To upgrade, follow the instructions at http://www.apple.com/iPhone/software update/. Please upgrade to iPhone OS 3.0 before setting up Google Sync.
2. Perform a sync with iTunes to ensure that Contacts and Calendars from your iPhone are backed up to your computer.
Getting Started
1. Open the Settings application on your device’s home screen.

2. Open Mail, Contacts, Calendars.
3. Tap Add Account….

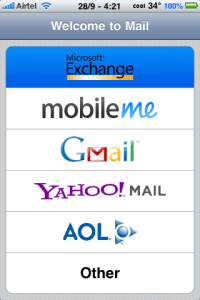
4. Select Microsoft Exchange.
Enter Account Info
5. In the Email field, enter your full Google Account email address. If you use an @googlemail.com address, you may see an “Unable to verify certificate” warning when you proceed to the next step.
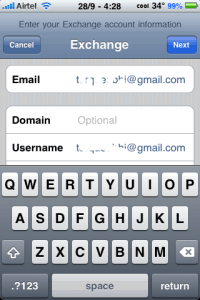
6. Leave the Domain field blank.
7. Enter your full Google Account email address as the Username.
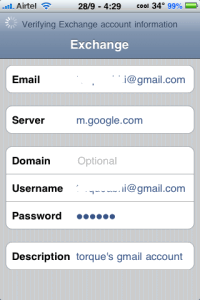
8. Enter your Google Account password as the Password.
9. Tap Next at the top of your screen.
9a. Choose Accept if the Unable to Verify Certificate dialog appears.

10. A new Server field will appear. Enter m.google.com
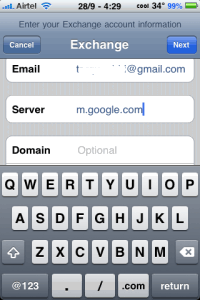
11. Press Next at the top of your screen again, leave domain blank
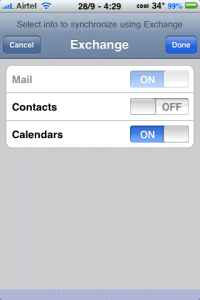
12. Select the Google services you want to sync.
13. Unless you want to delete all the existing Contacts and Calendars on your phone, select the Keep on my iPhone option when prompted. This will also allow you to keep syncing with your computer via iTunes.
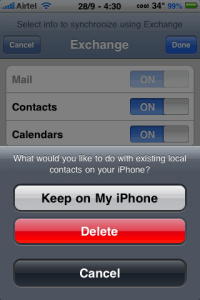
If you want to sync only the My Contacts group, you must choose to Delete Existing Contacts during the Google Sync install when prompted. If you choose to keep existing contacts, it will sync the contents of the “All Contacts” group instead
You’ve set up Google Sync for your iPhone. Synchronization will begin automatically if you have Push enabled on your phone. You can also open the Mail, Calendar or Contacts app and wait a few seconds to start a sync.
Coming soon: How to enable Push Notifications for Google Sync: Gmail Account