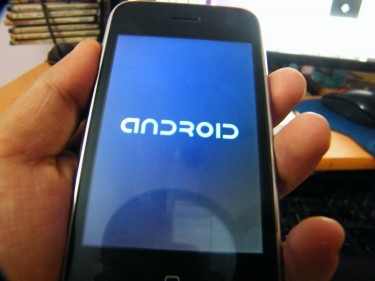
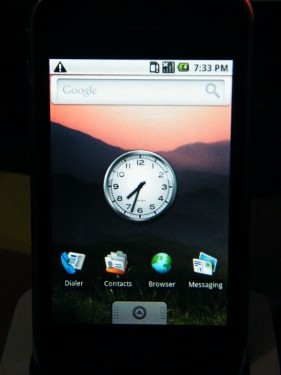
Android port is out for iPhone 3G, though its in beta stage, and if you are excited about your iPhone running Android OS then you can definitely give this a try.
Before installing Android on your iPhone 3G, make sure you’ve following things:
- First thing you need is jailbroken iPhone 3G with firmware version 3.1.2.
- Next thing that you need a PC with Ubuntu OS(32 bit)(or virtual machine will do) and Windows OS too.
- Download Android firmware for iPhone 3G from here:
- You will also need iPhone 3G firmware, most probably it would be somewhere in your PC if not then download it from here , You’ve to download only that firmware which is currently installed on your iPhone 3G.
- Now you need to download WIFI drivers, You can download it from here , Go to the URL, and on the right side of the page you should see a drop-down menu labeled ‘Choose your platform’. Select Linux 2.6 – Fedora from the drop-down menu and click the Search button underneath. Download the file labeled SD-8686-LINUX26-SYSKT-9.70.3.p24-26409.P45-GPL. You’ll get a file called SD-8686-LINUX26-SYSKT-9.70.3.p24-26409.P45-GPL.zip.
Once we’ve the above things, we are ready to install Android, Here are the steps:
.
1. Start Ubuntu OS on your PC, then create a folder named ‘firmware‘ on home folder.
.

2. Now extract SD-8686-FEDORA26FC6-SYSKT-GPL-9.70.3.p24-26409.P45.tar file from SD-8686-LINUX26-SYSKT-9.70.3.p24-26409.P45-GPL.zip to a temporary folder.
.
3. Now goto temporary folder where you’ve extracted ‘SD-8686-FEDORA26FC6-SYSKT-GPL-9.70.3.p24-26409.P45.tar‘, double click on it and you will see a folder by name ‘Fwimage‘ Open it.
.
4. You will see two files by name: ‘helper_sd.bin’ and ‘sd8686.bin‘, Extract these files to temporary folder and then go to temporary and rename file helper_sd.bin to sd8686_helper.bin.
.
5. Create a folder named ‘idroid‘ on home folder and copy the iPhone firmware file(iPhone1,2_3.1.2_7D11_Restore.ipsw) in this folder.
.

.
6. As you’ve already downloaded Android firmware, goto that location where it is saved. Its name is ‘idroid-release-0.2-3g.tar.bz2‘, double click on it and look for ‘utils‘ folder. Now open ‘utils‘ folder and you will see the files by name ‘dripwn‘, ‘loadibec‘ and ‘oibc‘,extract them to ‘idroid’ folder.
.

.
7. Now launch Terminal(Applications>Accesories>Terminal) and type two commands mentioned below.:
.
cd ~/idroid
./dripwn iPhone1,2_3.1.2_7D11_Restore.ipsw a8a886d56011d2d98b190d0a498f6fcac719467047639cd601fd53a4a1d93c24e1b2ddc6
Note that second command is in one line only, there is only a space between ipsw and code.
8. After a while, the command will finish and you will have zephyr_main.bin, zephyr_aspeed.bin, and zephyr2.bin in your ‘idroid‘ folder. Move these files into the ‘firmware‘ folder.
.
9. Again goto the location where Android firmware is saved. Double click on ‘idroid-release-0.2-3g.tar.bz2‘, look for ‘prebuilt‘ folder. Now open ‘prebuilt’ folder and you will see 7 files in this folder, Extract android.img.gz, cache.img, ramdisk.img, system.img, userdata.img, and zImage to temp folder. and extract openiboot.img3 to idroid folder.
.

.
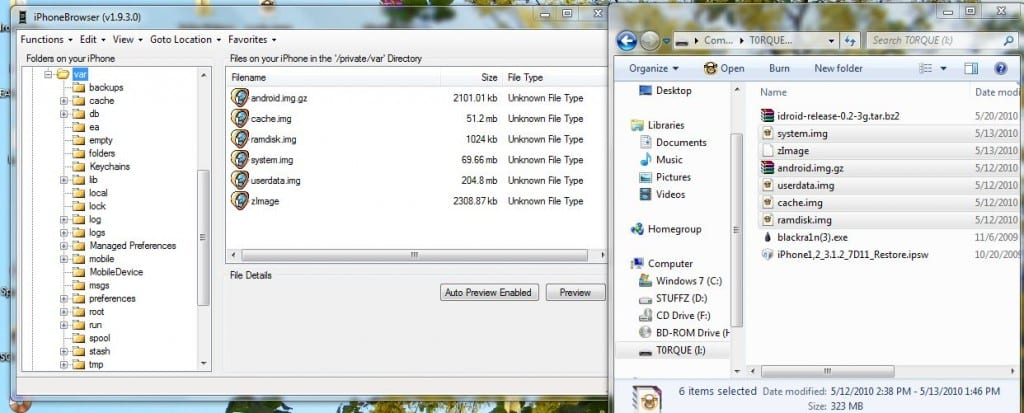
10. Now you need to copy ‘firmware‘ folder and extracted files (android.img.gz, cache.img, ramdisk.img, system.img, userdata.img, and zImage) from above step to your iPhone’s /private/var folder.
.
.
You can use iPhoneBrowser(will work on Windows machine and it is preferred as it is quite easy) or you can SSH by using below commands on terminal:
.
scp android.img.gz root@[ip address of iPhone]:/private/var/
scp cache.img root@[ip address of iPhone]:/private/var/
scp ramdisk.img root@[ip address of iPhone]:/private/var/
scp system.img root@[ip address of iPhone]:/private/var/
scp userdata.img root@[ip address of iPhone]:/private/var/
scp zImage root@[ip address of iPhone]:/private/var/
Using the SFTP client or scp, create a folder called firmware in the /private/var folder on the iPhone; afterward, upload all the files from the ‘firmware’ folder you created earlier to it.If the ‘firmware’ folder you created earlier is inside your home directory, you can use the following command:
.
scp -r ~/firmware/ root@[ip address of iPhone]:/private/var/firmware
.
11. Once all files and firmware folder are copied on your iPhone’s /private/var folder, reboot your iPhone.
.
12. Now Put the phone in Recovery mode; you can do by just switch off the phone and now by pressing the home button plug the data cable, keep pressed the home button until you see a iTunes and Datacable logo
on your iPhone screen.
.
13. Open Terminal on Ubuntu and type the below commands:
.
sudo apt-get install libreadline5-dev
cd ~/idroid
sudo ./loadibec openiboot.img3
.

.
14. Now you will see the OpeniBoot menu on iPhone, where you switch between Apple OS, Console and Android OS by pressing the Volume buttons of iPhone. Select the ‘Console‘ (the middle icon) and press home button to launch it.
.
15. A text console will appear now type the below command:
.
sudo ./oibc
.

.
16. You will the same messages on you iPhone screen
.
17. Again type below 3 commands one by one on terminal:
.
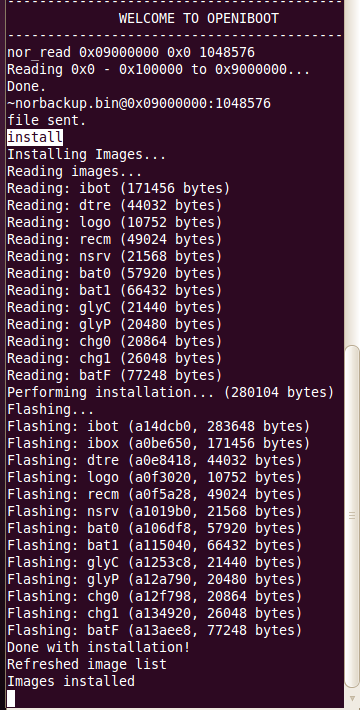
nor_read 0x09000000 0x0 1048576
.

.
~norbackup.bin@0x09000000:1048576
.
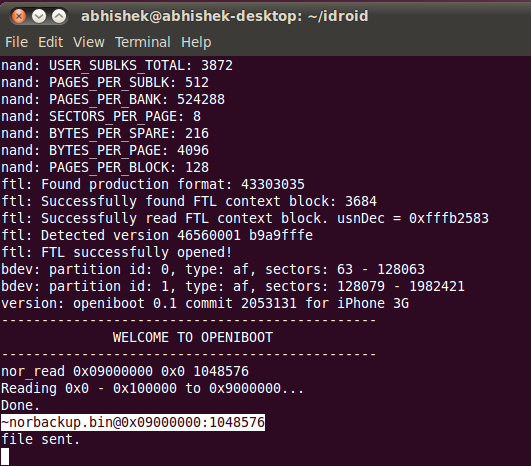
install
.
.
18. This process will take sometime. Wait until the installation-complete message appears.
.
19. Now again type below command on terminal:
.
reboot
.

20. And now you can exit the Terminal oibc by pressing Ctrl+C
.
You are done !!! Choose the Android OS and press home button to boot it, Likewise you can choose Apple iphone OS. There is no option to shutdown on this Android port, so the only way to turn it off is to hold down the Hold and Home buttons until you’ve forced the phone off.
You are done !!! Choose the Android OS and press home button to boot it, Likewise you can choose Apple iphone OS. There is no option to shutdown on this Android port, so the only way to turn it off is to hold down the Hold and Home buttons until you’ve forced the phone off.
