When I bought my first smart phone, a Spice MI 280, I was a total noob. Had no idea in terms of what to look for in an Android device, what kind of configurations were best (of course bigger the better is the general principle :P). So when I purchased this phone, I realised there was too little internal memory for installing more than 10 apps at a time. And that was really irritating for you see, on a smart phone, we all tend to install all kinds of stuff which we think could be of a BIG use later on, but then we never really use them. I mean in-spite of the Domino’s app on the Google Play Store, how many times do we really rely on that application to order the pizza? That one phone call seems the easier way. But being one of the enthusiasts I would still love to keep in store as many apps as I could. However, that 170 odd MB of internal memory was obviously not sufficient. Thus, started the hunt for the solution.
Now to make long story short, if you too are suffering from the same problem of low internal storage, then here is a quick solution!
PLEASE NOTE: This is ONLY for ROOTED devices. If you do not understand what that means, then hit that red cross on top right corner and run away from the computer before it explodes into shreds!
Now for those who are ready, and have rooted their devices already, here is a quick list of stuff that you will need before we begin:
1. Mini Partition Tool. Download from here => |Click Me!|
2. SD Card reader (preferable/otherwise USB cable can also be used under “USE AS STORAGE” mode)
3. Link2SD app installed on your Android Device (make sure the app is given the Superuser rights)
Download from here => |Click Me!|
4. Backup your SD card.
5. Buck load of patience!!
Now if you are ready with the stuff, proceed this way :
1. Connect your SD Card to your PC/Laptop.
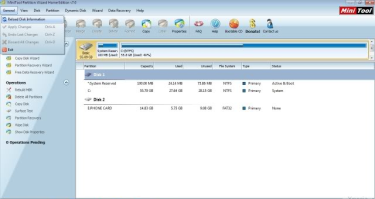
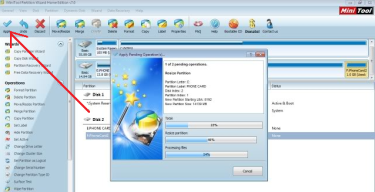
2. Open MiniPartition Tools. You will be able to find the SD Card down below.
3. Now follow these graphics
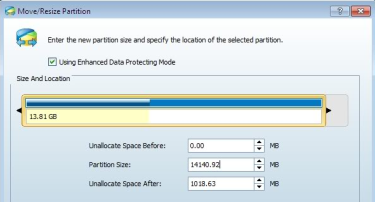
After finding the SD Card, right click -> Move/Re-size Partition. About 512 MB will be sufficient.
After hitting OK on this screen, you will be taken back to the main screen of the program. Here you will find a new partition created just below the SD Card. It will have just * as the name. Right click that partition, and hit CREATE, follow the graphics for understanding.
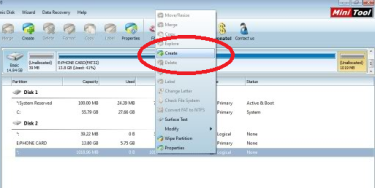
After hitting create, a Window will pop up saying that Windows will not be able to show that partition. Ignore that message and hit OK.
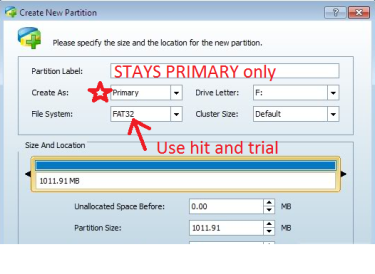
After this, the next step is EXTREMELY important. Keep the settings as shown in the image below. Please make sure that there is NO CHANGE in any values from what is shown below.
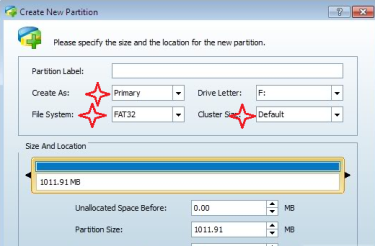
Apply all these changes. There will be an option to APPLY these changes on the top left side.
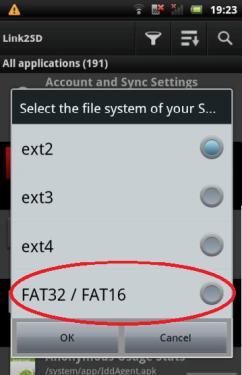
Now when you insert your card back, open Link2SD and if all went well, you should be able to see this screen.
Select the option as FAT32/16
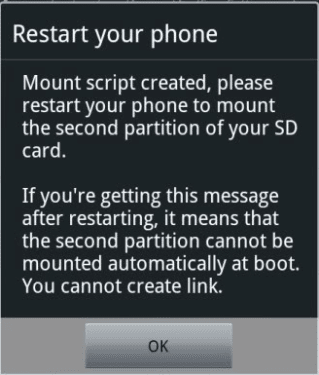
Then tap OK on seeing this screen.
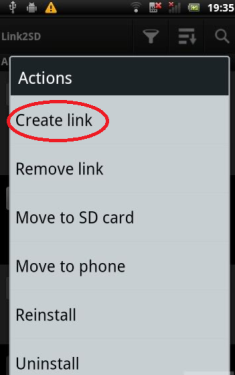
Thats it!! Now you can open your application list on Link2SD, multi-select your apps, and link them to the SD patition.
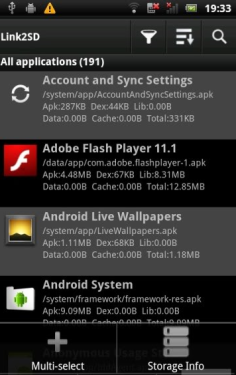
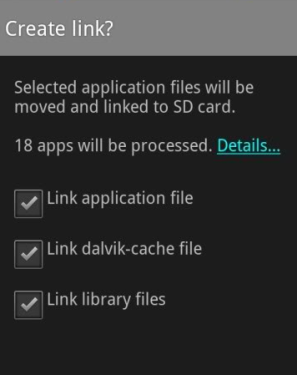
Make sure all the three option are selected.
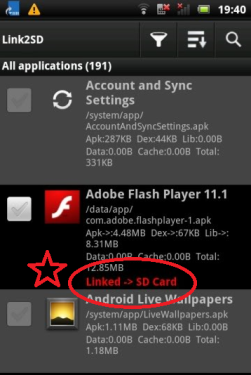
As soon as all the apps you selected are linked to the partition, you should be able to see this below all the linked apps.
Tada! All thats all folks! These few simple steps will save your internal memory drastically!
Now few divices are known to have caused problems while setting the partition file system as FAT. For those device holders, there is a hit and trial method. While using the minipartition tool, set the file system of the partition as EXT2 / EXT3 / EXT 4. And while using Link2SD, make sure you tap on the same filesystem as you selected in this step :
 Do not worry that during hit and trial you are going to lose storage space! Each time a file system fails, simply format the SD Card using MiniPartition tool!
Hope this tutorial was of some use. Drop a comment if you liked!